Custom Golf-Ball Case

Prices incl. VAT plus shipping costs
Despatch time approx. 8 working days, after the Christmas break, from 06.01.2025
Please Configure Your Product
Dimensions
Cut-outs for golf-balls
Golf-balls per compartment
Front-panel
Back-panel
- Order number: G20400
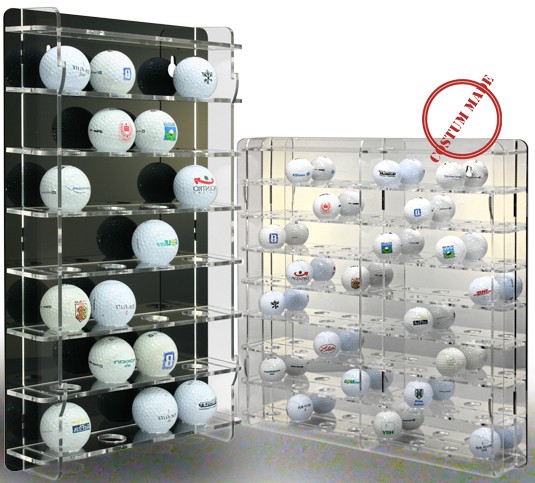
Do you have trouble finding a display cabinet that suits the individual needs of your collection? Perhaps you have models or specimens which are unusually shaped – or perhaps you simply have a clear mental vision of exactly what the perfect cabinet should look like. Either way, ordering a Made-to-Measure Display Cabinet could be the answer.
Prices for a custom golf-ball case begin at €25, and vary according to the size and features you are looking for. Best of all, there’s no need to wait to find out how much your dream case will cost! By using our customisation tool, you can calculate the exact price and, if you’re satisfied, add it straight to your shopping cart so that we can begin making it for you as soon as possible.
SOME HINTS:
- When you are using the customisation tool, please remember that all measurements are in centimetres.
- Due to the nature of acrylic panels, some combinations of dimensions (eg, a case which is 75cm tall and 75cm wide) are not possible. Making cases with these combinations would be very likely to result in breakages, which of course we work hard to avoid. Other combinations are possible, but may result in a different shipping option being used (our standard shipping option can only handle packages of certain sizes). If you select a combination of dimensions that could cause problems, an error message will appear. You may then adjust your chosen dimesions so that you can go ahead and order right away.
- If you have any questions or problems, please feel free to write an e-mail us on info@sorashowcases.com and one of our friendly staff members will be able to help you out.
Step One: Decide how many shelves you want, and select that number from the drop-down box.
Step Two: Decide how many columns you want, and select that number from the drop-down box. This shows how many compartments each shelf will be divided into. For example, if you select 1 column, then there will be no divider in each shelf. If you select two columns, each shelf will be divided in half, and so on.
Step Three: Decide whether you want your cabinet with or without a front panel, and select the appropriate response from the drop down box. Adding a front panel costs a little extra, but will help protect your collection from visitors, children and pets.
Step Four: Choose the type of back panel you would like for your cabinet: transparent, reflective or black. Think carefully, because this will affect the appearance of your display. You may like to look at the sample pictures provided on this website to get an idea of what the different back panel options look like.
Step Five: Decide how wide you want your cabinet to be, and select the appropriate number from the drop down called ‘Width (Outside)’. Then, select how tall you want your cabinet to be, and select the appropriate number from the drop down called ‘Height (Outside).
Step Six: Decide how deep you want your cabinet to be, and select the appropriate number from the drop down called ‘Depth (Inside) ’.
Step Seven: Click on ‘Calculate Now’ to produce a list of the specifications for your custom cabinet. If there is a problem with something you have entered, an error message will appear, explaining what you need to do to fix it. If everything is fine, you will see a summary which includes the dimensions of your cabinet, the number of shelves and compartments it will contain, and the price.
Step Eight: If you are ready to order, go ahead and click on ‘Add to Shopping Cart’, then click on ‘My Shopping Cart’ to review postage costs and check out. Alternatively, you are welcome to adjust settings as many times as you like until you find the custom cabinet that perfectly suits your needs.
Step Nine: We will build your cabinet and ship it to you in approximately five working days. It will arrive as an easy-to-assemble kit (with illustrated instructions included) and requires no tools or adhesives to put together.
And remember: If you have any difficulties in the course of ordering a custom cabinet, just email us on info@sorashowcases.com We’re always happy to help!
TECHNICAL DETAILS
You can choose between different designs of the back-panel (black, transparent or reflective) as well as you can order your individual showcase with or without a front-panel. The number of shelves as an input field means how many horizontal layers your rack is supposed to have, whereas the number of columns equals the number of vertical units.
The total number of shelves as a result of your inputs (number of shelves * number of columns) will be displayed below the input fields of the construction tool. All custom display cabinets are based on the proprietary sora connector system. They are delivered as an easy to build up construction kit. The parts of the construction-kit are joined with acrylic splines. Therefore you won't need any additional tools or adhesives to build up your rack. For further information about the construction principle of the display cabinet, please check our construction manual.
EXAMPLES
1. Acrylic rack with 8 shelves and 1 column
The single-columns version of an acrylic rack can be designed with a maximum width of 30 cm if the input for 'depth' is not more than 7 cm. If both measurements exceed these limits the shelves, there is the danger of the shelves bending in the middle if you put a heavier item on it. Therefore the online configuration tool will display an error message and suggest to either reduce the width of the cabinet, reduce the depth below 7 cm, or to insert an additional column.
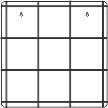
2. Acrylic rack with 3 shelves and 3 columns
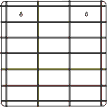
3. Acrylic rack with 6 shelves and 3 columns
FRONT PANEL
The front-panel is made of crystal-clear 3 mm thick transparent acrylic and can be attached to the rack by hook-mounting. The side-panels of the rack have acrylic hooks, which are designed to hold the front-panel. If you order your display cabinet without a front-panel, the side panels will have no mounting hooks.
ERROR MESSAGES
If a certain combination of settings is not possible, the online configuration tool will display one or more error messages. Please change the settings of your acrylic display cabinet according to the error messages.


